Scene Object and Transform
In Uniform, the Scene (all the objects you see inside a panel) is an Object Type, just like the GeoMesh object you use for high poly sculpting. This means you can use Uniform tools to edit the Scene directly.
A scene in Uniform is composed of multiple elements called nodes. Each node will render an object with a particular position and rotation. These nodes can be transformed, duplicated or deleted like vertices in a mesh, using the same tools.
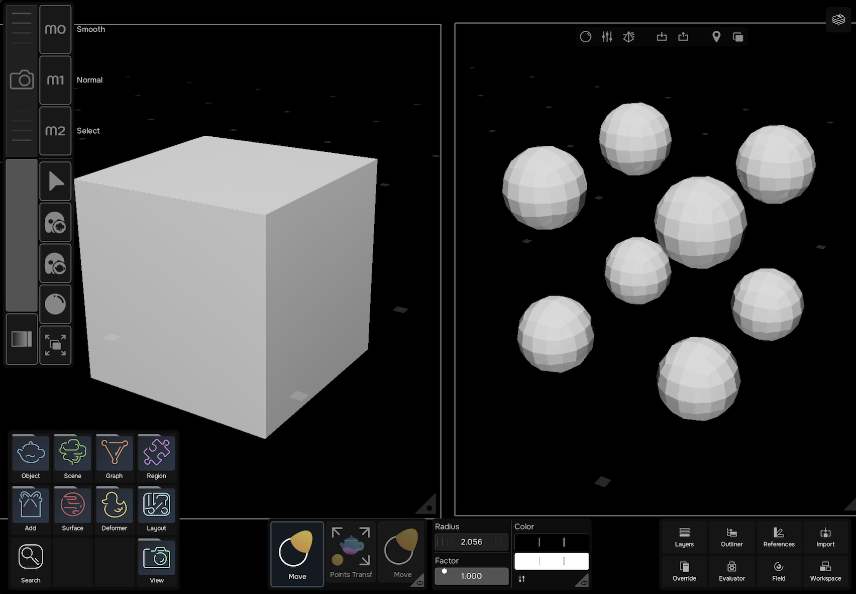
Let’s see this in action. On the left there is a panel with a scene that has a single GeoMesh cube. On the right, the panel has 8 GeoMesh Sphere objects distributed as the corners of a cube.
Under Deform -> Transform you will find two tools, Scene Transform and Transform. The tools have two different icons: a tree (scene tool) and a teapot (object tool). You’ll find this pattern in many other areas of Uniform.
The Transform tool will deform the selected GeoMesh object, as we saw so far. This means that the tool is targeting the Selected Object Node on this scene.
If you use the Scene Transform tool, the tool will now target the Scene Node of this viewport. This means that it will move the positions of the Nodes that draw objects to the viewport. The tool is now editing the Scene Object. You see that now the spheres move like vertices of the cube, but each sphere is an individual object.
Every tool has a “Node Policy” module at the end of its module inspector. This module is what controls what nodes the tool should target. Both transform tools we discussed were configured exactly the same except for the “Active Node Policy” property of this module. Set this property to “Scene Node” to make any tool affect the Scene Object directly.
For example, you can set the “active node policy” of the Move tool to smoothly change the distribution of objects in the scene.
Next step: Region Partial Visibility